• Skip to primary navigation
  • Skip to main content
  • Skip to primary sidebar

Crossfield Collection Recipes

  • Main Dish
  • Beverages
  • Appetizers
  • Cakes
  • Cookies
  • Holiday
  • Books
  • Journal
You are here: Home / 2021 / Archives for August 2021

Archives for August 2021

Apple Bars from Ina Garten

August 31, 2021 by Serena Leave a Comment

apple bar squares

For the Crust

1 pound (4 sticks) unsalted butter, at room temperature
3/4 cup granulated sugar
1/2 cup light brown sugar, lightly packed
2 teaspoons pure vanilla extract
4 cups all-purpose flour
1 1/2 teaspoons kosher salt
1/2 cup chopped walnuts
1 teaspoon ground cinnamon

For the apple filling:

1 1/2 pounds Granny Smith apples, peeled, quartered, cored, and sliced 1/8 inch thick (3 large)

1 1/2 pounds Golden Delicious apples, peeled, quartered, cored, and sliced 1/8 inch thick (3 large)

2 tablespoons freshly squeezed lemon juice

1/4 cup granulated sugar

1 teaspoon ground cinnamon

1/8 teaspoon ground nutmeg

4 tablespoons (1/2 stick) unsalted butter

Directions

  1. Preheat the oven to 375 degrees.
  2. For the crust, place the butter, granulated sugar, brown sugar, and vanilla in the bowl of an electric mixer fitted with the paddle attachment and beat on medium speed for 2 minutes, until light and creamy. Sift the flour and salt together and, with the mixer on low, slowly add to the butter-sugar mixture, beating until combined. Scatter two-thirds of the dough in clumps in a 9 x 13-inch baking pan and press it lightly with floured hands on the bottom and 1/2 inch up the sides. Refrigerate for 20 minutes. Bake for 18 to 20 minutes, until the crust is golden brown, and set aside to cool.
  3. Meanwhile, put the mixing bowl with the remaining dough back on the mixer, add the walnuts and cinnamon, and mix on low speed to combine. Set aside.
  4. Reduce the oven to 350 degrees.
  5. For the filling, combine the Granny Smith and Golden Delicious apples and lemon juice in a very large bowl. Add the granulated sugar, cinnamon, and nutmeg and mix well. Melt the butter in a large (10-inch-diameter) pot, add the apples, and simmer over medium to medium-low heat, stirring often, for 12 to 15 minutes, until the apples are tender and the liquid has mostly evaporated. Spread the apples evenly over the crust, leaving a 1/2-inch border.
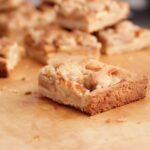
  6. Pinch medium pieces of the remaining dough with your fingers and drop them evenly on top of the apples (they will not be covered). Bake for 25 to 30 minutes, until the topping is browned. Cool completely and cut into bars.

Cook’s Note

Ina lined the baking pan with parchment paper before making the crust.

“Cooking for Jeffrey” by Ina Garten © Clarkson Potter 2016. Provided courtesy of Ina Garten. All rights reserved.

  • Level: Intermediate
  • Total: 2 hr (includes chilling time)
  • Active: 50 min
  • Yield: 12 bars

My thoughts: it was a lot of steps and lots of time to prepare. It was nothing that special. It was sort of difficult to make the crust go up the sides.  Would not make this a favorite. Other Apple Bars were better than this recipe.  Main issue was the amount of butter (over a pound of butter) to make the crust. The apples I used were Granny Smith and a new variety called Pink Lady.

Filed Under: Uncategorized

Pickled Banana Pepper Rings

August 30, 2021 by Serena Leave a Comment

Banana Sweet Peppers – 1 pound with stem removed (approx)

Brine Ingredients:
3 cups white distilled vinegar
2 cups water
1 1/2 tablespoons canning salt
1 tablespoon sugar
scant 1/2 teaspoon turmeric

Prepare canning jars for water bath canning and keep sterilized  jars hot.  Use new canning lids and rings. (don’t reuse canning lids). Follow recommended USDA method for water bath canning of pickles.

Wash, de-seed and slice banana peppers into rings into desired thickness. Can add hotter pepper varieties if desired for a mixture of hot and mild pickled peppers. If using hot peppers be sure to wear gloves for protection from the oils in the hot peppers.

You don’t have to be concerned about getting all of the seeds out but try to remove as many as you can along with the white sections from the pepper. Keeping all of the seeds in is a personal preference. I just try to cut down on the amount of seeds in the jar and so I have more peppers than seeds in jars.

Make pickling brine using proportions above to pour over peppers and use prepared pint canning jars.

Bring the vinegar, sugar, salt to a rolling boil in saucepan. Keep brine hot as you fill each jar with rings and brine. Make more brine as needed depending on number of jars to be processed.  Brine can be refrigerated and reheated as needed if you are small batching depending on quantity being processed.

  1. Add one glove of garlic (crushed to release flavor) in bottom of each jar (optional )before packing with prepared pepper rings.  Optional is one teaspoon of chopped garlic if you don’t have fresh cloves.  The garlic is totally optional.
  2. Pour hot brine over peppers to within ½” of the top. Pack tightly since rings will shrink when processed. Leave 1/2 inch headroom in each jar.  Remove air bubbles from jar.
  3. Wipe off the rim and put lid and ring on.
  4. Process pints for 10 minutes in boiling water bath.
  5. Cool completely for at least 12 hours and check for a good seal. Remove band from jars, wash and label jars. Use within one year for best quality and flavor.


TIPS FOR MAKING PICKLED BANANA PEPPERS:

Follow proper canning procedures and then process in a water bath canner. Follow the USDA guidelines for proper sterilization and timing. Be sure to verify that the lids have completely sealed before storing on the shelf.  Make sure your banana peppers are fresh and have been rinsed well.

  • Keeping the seeds in or not is personal preference. I usually get most of the seeds out but there are always a few that stay in there and it doesn’t affect taste at all. I don’t fuss too much over that.
Instructions
Bring the vinegar, sugar, salt to a rolling boil in a saucepan for making the brine for the pickles.
  • Pour hot brine over jars filled with the pepper rings  to within ½” of the top.
  • Wipe off the rim and put canning lid and jar ring on. Get as many air bubbles out as you can. Only tighten jar ring to ensure lids stays on jar. Do not over tighten.
  •  Follow proper canning procedures and then process filled jars in a boiling water bath canner for 10 minutes. Follow the USDA guidelines for proper sterilization and timing.

Notes

  • Keeping the seeds in or not is personal preference. I usually get most of the seeds out but there are always a few that stay in there and it doesn’t affect taste at all. I don’t fuss too much over that.
  • This recipe makes 2 pints.

Filed Under: appetizer, Pickles and Relish

Chinese Brown Sauce

August 12, 2021 by Serena Leave a Comment

  • 3/4 cup beef broth
  • 1 1/4 tablespoons oyster sauce
  • 1 teaspoon dark soy sauce or more to taste
  • 1/2 teaspoon sugar
  • 1 tablespoon cornstarch (corn flour or potato starch)

Add the broth, oyster sauce, dark soy sauce, sugar, and cornstarch to a saucepan.

Mix evenly and make sure there are no lumps of cornstarch.

Bring it to a boil while stirring. Simmer until the sauce reaches the desired thickness.

Use this basic brown sauce as a base sauce for dishes such as beef and broccoli, chicken and broccoli, and other beef, pork, and chicken stir-fries.

  • Chicken Broth Version: Combine 1 cup chicken broth (or chicken stock), 1 1/2 tablespoons oyster sauce, 2 teaspoons dark soy sauce, 1/2 teaspoon brown sugar, and 1 tablespoon cornstarch (or potato starch) in a saucepan. Mix evenly and make sure there are no lumps. Bring to a boil and keep stirring during cooking. Simmer until the sauce reaches the thickness you like.
  • Add 1 grated garlic clove.
  • Add 1 teaspoon grated fresh ginger.
  • Add chili sauce or chili oil if you’d like your brown sauce spicy.


Filed Under: Main Dish

Primary Sidebar

Recent Posts

  • My Best Clam Chowder
  • Banana Cake with Cream Cheese Frosting
  • Easy Goulash Recipe
  • 2024 zucchini rounds
  • 2024 Peanut Butter Cookies

Recent Comments

    Archives

    • February 2025
    • January 2025
    • August 2024
    • June 2024
    • May 2024
    • March 2024
    • February 2024
    • January 2024
    • December 2023
    • October 2023
    • August 2023
    • July 2023
    • June 2023
    • May 2023
    • February 2023
    • January 2023
    • December 2022
    • November 2022
    • October 2022
    • September 2022
    • August 2022
    • July 2022
    • May 2022
    • April 2022
    • January 2022
    • December 2021
    • November 2021
    • October 2021
    • September 2021
    • August 2021
    • July 2021
    • June 2021
    • May 2021
    • April 2021
    • January 2021
    • December 2020
    • November 2020
    • October 2020
    • September 2020
    • August 2020
    • July 2020
    • June 2020
    • January 2020
    • October 2019
    • September 2019
    • August 2019
    • July 2019
    • December 2018
    • October 2018
    • September 2016
    • October 2014
    • January 2014
    • December 2013
    • October 2013
    • September 2013
    • June 2010
    • February 2010
    • January 2010
    • October 2009

    Categories

    • appetizer
    • beef
    • Beverages
    • Bread
    • Breakfast
    • cabbage
    • Cakes
    • Candy
    • casseroles
    • chicken
    • Cook Books
    • Cookies
    • Desserts
    • drinks
    • Equipment
    • Family
    • Featured
    • Holiday
    • jams jelly preserves
    • Main Dish
    • pasta
    • Pickles and Relish
    • Pie and Pastry
    • Preserving
    • printed in binder
    • pumpkin
    • Recipe Box on desk
    • rhubarb
    • Salads
    • seafood
    • side dish
    • Soup
    • turkey
    • Uncategorized
    • Vegetable
    • zucchini

    Meta

    • Log in
    • Entries feed
    • Comments feed
    • WordPress.org

    Copyright © 2025 Crossfield Collection Recipes on the Foodie Pro Theme