• Skip to primary navigation
  • Skip to main content
  • Skip to primary sidebar

Crossfield Collection Recipes

  • Main Dish
  • Beverages
  • Appetizers
  • Cakes
  • Cookies
  • Holiday
  • Books
  • Journal
You are here: Home / Archives for Vegetable

Vegetable

Honey Roasted Carrots and Parsnips

January 13, 2024 by Serena Leave a Comment

Ingredients

4 medium carrots
4 medium parsnips
2 tablespoons honey
2 tablespoons butter, melted
2 tablespoons olive oil
1 teaspoon kosher salt
1/2 teaspoon black pepper
fresh thyme sprigs or parsley if desired

Instructions

  1. preheat oven to 425 degrees. Line a try with parchment or alum foil.
  2. scrub carrots and parsnips well, and slice off the root and stem ends.
  3. Cut the vegetables in half, then cut each half lengthwise in half or into thirds for the thicker ends. Optional – cut into round thin slices.
  4. spread the carrots and parsnips ina single layer of a parchment lined baking sheet and put the honey mixture over them. Toss with hands to coat well. (use a plastic bag and shake to evenly coat and then pour on the baking sheet for less mess)
  5. Sprinkle with thyme, salt, and pepper
  6. Roast for 30 minutes, turning halfway through, or until the vegetables are fork tender and beginning to brown.
  7. Serve hot, garnished with more fresh thyme springs or parsley if desired.

HELPFUL TIPS

  • Try to cut the vegetables into equal sized pieces to ensure that they cook evenly.
  • Make sure the vegetables are spread in a single layer on the baking pan. This will allow the pieces to cook evenly, and also let’s them brown instead of steam.
  • You can easily double or even triple this recipe.
  • You can use just carrots for honey roasted carrots, or parsnips for honey roasted parsnips.
  • For a vegan version of these glazed parsnips and carrots, substitute maple syrup for the honey and replace the butter with more oil.
  • If you like a little bit of spice to balance the sweetness, try adding a pinch of red pepper flakes to the honey mixture before coating the veggies.
  • Store leftovers in the fridge in an airtight container for up to three days.
 

Filed Under: printed in binder, Vegetable

Sweet Pickle Relish

August 29, 2023 by Serena Leave a Comment

Ingredients
3 to 4 pounds medium pickling cucumbers, unpeeled, finely chopped ( (6 to 8 cups)
2 cups finely chopped onions (2 to 3 medium)
3 tablespoons pickling salt
2 to 3 cups of ice cold water
1 1/2 to 3 cups granulated sugar (depending on how sweet you like your relish)
2 cups cider vinegar at 5% acidity
1 1/2 teaspoons mustard seeds
1 1/2 teaspoons celery seeds

Instructions
1. In a large bowl, layer the cucumbers, onions, and salt. Add enough cold water to completely cover the vegetables. Cover and let stand at room temperature for 2 hours.

2. Drain the vegetables in a large fine-mesh sieve or colander lined with a single layer of cheesecloth. Rinse well and drain again, pressing out the excess liquid.

3. IN a 6 to 8 quart stainless steal pot, combine the sugar, vinegar, mustard seeds, celery seeds. Bring the mixture to a boil over medium high heat, stirring constantly until the sugar is completely dissolved. About 5 minutes.

4. Add the drained vegetable to the syrup and return to a boil. Reduce the heat and simmer, stirring frequently for 10 minutes. Remove from the pot from the hear. The mixture may look watery but that is okay. Ladle the relish into hot pint jars, leaving 1/2 inch headspace. Remove air bubbles. I also use half pint jars so I have smaller jars when opened. Wipe the jar rims and threads with a clean, dampt paper towel. Apply hot lids and screw bands.

5. If you are simply stashing the relish in fridge, refrigerate the jars of relish for up to a few weeks.
If you are properly canning the pickle relish, process 8 ounce jars in a water bath canner according to recommended directions and time. 10 minutes for pints and 15 minutes for quarts. 10 minutes for half pint jars.  Remove from water bath canner and let cool for 12 to 24 hours. Check the seals and remove the screw bands. Store in a cool, dry, dark place for up to one year.

2023 – made in half pint jars


Filed Under: Pickles and Relish, Preserving, Vegetable

Sweet Potatoes – Yams Toppings

December 28, 2020 by Serena Leave a Comment

After cooking Sweet Potatoes or Yams Mix and Match favorite toppins and Enjoy

SWEET

Brown Sugar
Butter
Cinnamon
Raisins
Walnuts
Marshmallows
Pecans
Cream Cheese
Apples

SAVORY

Black Beans
Salsa
Rosemary and Olive Oil
Carlic Aioli
Spinach
Chicken
Broccoli and Cheddar
White Beans and Kale
Sausage
Goat Cheese


Filed Under: Vegetable

Mustard Pickles

August 19, 2020 by Serena Leave a Comment

INGREDIENTS

6 cups washed and diced pickling cucumbers
2 cups diced onion
1 cup canning/pickling salt
8 cups water or enough to cover the cucumbers and onions for the salt water soak
4 cups vinegar you can use apple cider or white vinegar but make sure it’s 5% acidity
4 Tablespoons sugar You can increase to 1 cup sugar if you prefer a sweeter flavor
2 Tablespoons ClearJel® optional, but produces a thicker relish
6 Tablespoons dry mustard
2 Tablespoons dry turmeric
2 teaspoons celery salt you can use regular salt, but the celery salt adds to the flavor
½ cup water

INSTRUCTIONS
Place cucumbers and onions in a large stainless steel or glass bowl.
Mix 1 cup of pickling/canning salt with 8 cups of cold water (double this as needed if doing a larger batch of pickles). Pour over top of cucumbers and onions, add more cold water if necessary to cover the tops of the cucumbers. Use a clean plate and place on top of the cucumbers to keep them under the surface of the ice salt water.
Fill a pint sized Mason jar with water (use a lid) and set it on top of the plate to act as a weight. Let soak for 1 to 2 hours on the counter or put the bowl in the fridge overnight or for 12 hours.
After soaking cucumbers and onions, pour out salt water and rinse thoroughly with cold water and allow cucumbers to drain.
Prepare water bath canner and begin warming the water.
In a large stainless steel pot, combine sugar, dry mustard and turmeric, celery salt, and ClearJel®, then pour in a ½ cup of water, whisking until combined and smooth. Pour in vinegar and bring to a full boil while stirring.
Once it’s reached a full boil, lower heat to a simmer and stir until it thickens up, then add the cucumbers and the onions and bring to a boil. When it reaches a boil with the vegetables added, keep at a low boil and cook for 5 minutes, stir as needed.
In jars just washed in hot soapy water and rinsed, pack the relish/pickle mixture to a ½ inch headspace. Remove air bubbles and add more product if needed to keep the ½ inch headspace. Clean the rim, put on lid and bands, and screw down to finger tip tight. Place filled jar into your water bath canner. Make sure at least 1 inch of water covers the top of the jars.
Bring water to a full boil, once water is boiling, process pints for 10 minutes.
Turn off heat, remove lid, and let jars sit in canner for 5 minutes. Then remove from canner and let cool and seal on a folded towel.

NOTES
You may safely sub in zucchini in place of cucumbers in this recipe per Ball Book of Complete Home Canning.
You can use either apple cider or white vinegar, just make sure it says 5% acidity (no homemade apple cider vinegar for canning recipes)
You may increase the sugar to taste, Great-grandma’s recipe only called for 4 Tablespoons sugar but if you prefer it sweeter you can add more sugar.

This old-fashioned mustard pickle recipe is straight from Great-Grandma’s kitchen and is delicious on sandwiches, hot dogs, hamburgers and in salads. A must make when the summer bounty is on!

Source: https://melissaknorris.com/wprm_print/15551

How to Make Mustard Pickles – Great-Grandma’s Recipe

Filed Under: Pickles and Relish, Uncategorized, Vegetable

Cream of Broccoli Soup

August 19, 2020 by Serena Leave a Comment

Ingredients

5 tablespoons butter
1 stalk celery, raw
1 onion, raw
3 cups chicken broth
8 cups broccoli, raw
3 tablespoons flour
2 cups milk
Spices
Salt and pepper

Step 1. Melt 2 tablespoons butter in medium sized stock pot, and saute chopped onion and chopped celery until tender. Add chopped broccoli and broth , cover and simmer for 10 minutes.

Step 2. Pour the soup into a blender, filling the pitcher no more than halfway full. Puree in batches until smooth and pour into a clean pot.

Step 3. In small saucepan, over medium heat melt 3 tablespoons butter, stir in flour and add milk. Site until thick and bubbly, and add to soup pot. Season with salt and pepper.

If you have a food processor – chop onions and celery together and then saute.  Chop Broccoli crowns leaving some larger pieces if desired.

2020 – chopped up all broccoli from the garden i n the food processor. Had four large heads.  Chopped onions and celery in food processor.  Then adjusted recipe above to make a thicken soup adjusting amount of liquid per amount of broccoli.  Put into freezer containers for later enjoyment.  Can use corn starch in place of flour in making the roux to thicken the stock. Cook until mixture is desired thickness for soup.


Filed Under: Soup, Uncategorized, Vegetable

Impossibly Easy Zucchini Pie

August 19, 2020 by Serena Leave a Comment

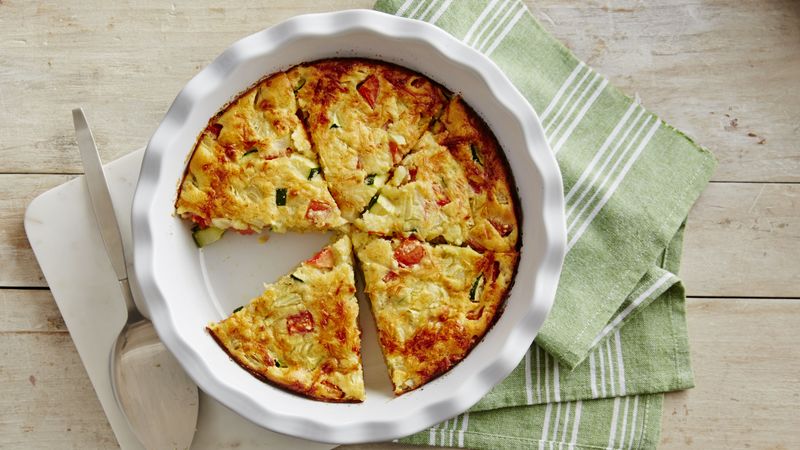
impossible zucchini pie

Ingredients
1 cup chopped or shredded zucchini
1 cup chopped tomato
1/2 cup chopped onion
1/3 cup grated Parmesan cheese
2/3 cup Bisquick
3/4 cup milk
2 eggs
1/2 teaspoon salt
1/4 teaspoon pepper

Heat oven to 400°F. Lightly grease bottom and side of pie plate, 9 inch size

Sprinkle zucchini, tomato, onion, and cheese evenly in pie plate.

Stir together remaining ingredients with fork until blended. Pour evenly into pie plate.

Bake about 35 minutes or until knife inserted in center comes out clean. Cool at least 10 minutes.

Modifed recipe from Betty Crocker.  Photo credits to Betty Crocker.


Filed Under: casseroles, Main Dish, Uncategorized, Vegetable

Sweet Pickle Relish

August 18, 2020 by Serena Leave a Comment

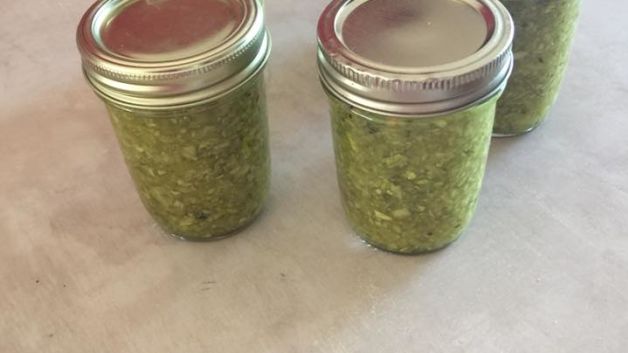
jars of sweet pickle relish

6 to 8 cups chopped pickling cucumbers – about 3 to 4 pounds medium size pickling cukes
2 cups finely chopped onions  ( 2 to 3 medium onions)
3 tablespoons pickling salt or kosher salt
2 to 3 quarts ice cold water with ice cubes
1 1/2 to 3 cups granulated sugar (depending on how sweet you like your relish)
2 cups cider vinegar
1 1/2 teaspoons mustard seeds
1 1/2 teaspoons celery seeds

In a large bowl, layer the chopped cucumbers, chopped onions, and salt. Add enough cold water (with ice cubes ) to completely cover the vegetables.  Cover and let stand at room temperature for two hours.

Drain the vegetables in a large fine-mesh sieve or colander lined with a single layer of cheesecloth. Rinse well and drain again, pressing out the excess liquid.

In a 6 to 8 quart stainless steel pot, combine the sugar, vinegar, mustard seeds, and celery seeds.  Bring the mixture to a boil over medium heat, stirring constantly until the sugar is completely;y dissolved, about 5 minutes.

Add the drained vegetable to the syrup and return to a boil. Reduce the heat and simmer, stirring frequently, for about 10 minutes.

Remove the pan from the heat. Ladle into Prepared sterilized hot print jars, leaving about 1/1 inch head space. Remove any air bubbles. Wipe jar rims and threads with a clean damp cloth. Apply hot lids and screw bands.

It you are simple stashing the relish in the fridge, refrigerate the jars of relish for up to a few weeks. If you are properly canning the pickle relish, process 8 ounce jars in a water bath canner for 10 minutes, and process pints for 15 minutes. Remove from the water bath canner and let cool for 12 to 24 hours. Check seals and remove the screw bands. Store in a cool, dry, dark place for up to 1 year.

This sweet pickle relish, made with cucumbers, sugar, onion, spices, cider vinegar is perfect for hamburgers and hot dogs, potato salad and any thing else. Makes 8 half pint jars of relish.  No need to buy the relish from the store if you make this recipe.

Made August 2020
Reference: Heinz Pickling Booklet – in pdf format in archive


Filed Under: Vegetable

Southern Style Green Beans

July 31, 2020 by Sadie Leave a Comment

During the cooking process, they soak up an amazing amount of flavor from bacon grease, chicken broth, seasoned salt, and garlic powder. I start by cooking some diced bacon in a large pot. I then set the bacon aside, but leave all the grease in the pan. You can leave the bacon in the pot to cook with the beans, but it will get a soggy texture. But the up side is the beans will have even more bacon flavor. Most times I add the cooked bacon back once I’ve drained the beans, but sometimes I just leave it in the pot for the cooking process.

Many times a ham hock is used instead of bacon, or in addition to bacon.

You want to cook Southern-Style Green Beans for at least an hour, preferably closer to 2 hours. You want them to get really soft, but not mushy, so that they are melt in your mouth tender. Just before serving, you can mix in a tablespoon or so of butter to give the green beans a buttery coating.

INGREDIENTS

4 slices bacon,, diced
2 pounds green beans ends snapped off and longer beans snapped in half
2 cups chicken broth
2 cups water
1 teaspoon seasoned salt
1/2 teaspoon black pepper
1/2 teaspoon garlic powder
1/4 teaspoon red pepper flakes
1 tablespoon butter, optional

Brown and crisp bacon in a large pot. Remove bacon from pot and reserve.
Add green beans to pot along with all remaining ingredients, except butter.
Bring to a boil and then turn heat to medium-low. Cover and simmer for 1-2 hours, stirring occasionally.
Drain beans and add butter if using. Check beans for seasoning and add extra salt and pepper to taste. I like lots of black pepper. Sprinkle with bacon and toss to distribute the bacon and butter.

Source – https://spicysouthernkitchen.com/
Posted on April 29, 2014 by Christin Mahrlig
Found from an internet search for green beans recipes July 2020

Filed Under: side dish, Vegetable Tagged With: green beans

Roasted Grape Tomatoe Sauce

July 30, 2020 by Sadie Leave a Comment

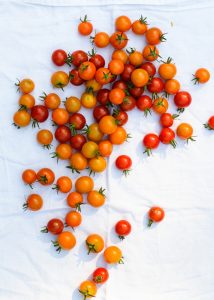
Quick and simple, homemade roasted cherry tomato sauce – packed with flavor from fresh cherry tomatoes that caramelize and become wonderfully jammy after a quick stint in the oven. This even more delicious take on traditional tomato sauce is made with simple ingredients like garlic, olive oil, basil, and thyme, and you’ll want to make batches all Summer long!

Ingredients

2–3 lbs cherry tomatoes, stems removed
1/4 cup good-quality olive oil, plus more for roasting
1 large yellow onion, diced
1 tbsp fresh garlic, minced
small handful fresh basil leaves
3–4 sprigs, fresh thyme, stems removed
kosher salt and freshly-ground black pepper

Instructions

Preheat the oven to 400 degrees F.

Toss the tomatoes with just enough olive oil to lightly coat, then spread out in an even layer onto a rimmed sheet pan or large baking dish. Roast for 25-30 minutes, until the tomatoes have burst and are just beginning to shrivel. Remove from the oven, tent loosely with aluminum foil, and set aside.

Meanwhile, add the 1/4 cup of olive oil to a heavy-bottomed sauce pot. Heat over medium-heat until the oil begins to shimmer. Add the onions and cook, stirring occasionally, until they begin to sweat and soften, about 4-5 minutes. Add the garlic, stir to combine, and continue cooking for another few minutes until the garlic is golden.

Add the roasted tomatoes (including all of the cooking liquid in the pan), and the herbs, and stir to combine. Season with salt and pepper, to taste.

Turn the heat down to low, partially cover the pot with the lid (leaving about a 1-inch gap), and let simmer for at least 25 minutes – and up to an hour – stirring infrequently as the sauce cooks.

Remove the pot from the heat, and let cool for 10-15 minutes. (Carefully!) Transfer the sauce to a blender (or use an immersion blender), and blend until the sauce reaches your desired consistency.

Pour the sauce into pint-size canning jars or other air-tight containers.

Will keep for up to a week in the refrigerator, or 3 months in the freezer.


Source : internet search for recipes that use cherry or grape tomatoes.

Copyright 2018 – Laura Bolton for Fork Knife Swoon

https://www.forkknifeswoon.com/quick-roasted-cherry-tomato-sauce/

Made this recipe on 07-28-2020.  Recipe is a keeper for all those grape tomatoes.

Can freeze for small portions as needed

Recipe for just roasted tomatoes using grape tomatoes.


Filed Under: pasta, Vegetable Tagged With: cherry tomatoes, tomatoes

Quick Baked Beans – Barbara Humphrey

June 10, 2020 by Sadie Leave a Comment

1 pound dry Great Northern Beans (cooked)

1/2 cup brown sugar
1/2 pound bacon, diced
2 tablespoons chopped onion
2 tablespoons ketchup
1 teaspoon salt
1 teaspoon dry mustard

Soak beans over night in cold water.

Cook 10 minutes with about 1 teaspoon baking soda. Drain, rinse well.

Cover with hot water and cook until tender (about one hour). Add hot water if needed.

Add rest of ingredients. Cover and bake gently for three hours at 300 degree oven.

Remove cover last half hour of baking to brown.

Barbara always used a bean pot casserole dish with cover.

Attachment is the recipe I got from Mom Humphrey in the wedding file box 1982. Well used as you can see from the spatters on the card. Barbara still makes better beans than I do. Must be the “mom” touch.

Quick Baked Beans – Barbara Humphrey

Baked Beans – Jack Rabbit Recipe

Baked Beans Barbara Humphrey

Filed Under: Family, Vegetable

  • Page 1
  • Page 2
  • Go to Next Page »

Primary Sidebar

Recent Posts

  • My Best Clam Chowder
  • Banana Cake with Cream Cheese Frosting
  • Easy Goulash Recipe
  • 2024 zucchini rounds
  • 2024 Peanut Butter Cookies

Recent Comments

    Archives

    • February 2025
    • January 2025
    • August 2024
    • June 2024
    • May 2024
    • March 2024
    • February 2024
    • January 2024
    • December 2023
    • October 2023
    • August 2023
    • July 2023
    • June 2023
    • May 2023
    • February 2023
    • January 2023
    • December 2022
    • November 2022
    • October 2022
    • September 2022
    • August 2022
    • July 2022
    • May 2022
    • April 2022
    • January 2022
    • December 2021
    • November 2021
    • October 2021
    • September 2021
    • August 2021
    • July 2021
    • June 2021
    • May 2021
    • April 2021
    • January 2021
    • December 2020
    • November 2020
    • October 2020
    • September 2020
    • August 2020
    • July 2020
    • June 2020
    • January 2020
    • October 2019
    • September 2019
    • August 2019
    • July 2019
    • December 2018
    • October 2018
    • September 2016
    • October 2014
    • January 2014
    • December 2013
    • October 2013
    • September 2013
    • June 2010
    • February 2010
    • January 2010
    • October 2009

    Categories

    • appetizer
    • beef
    • Beverages
    • Bread
    • Breakfast
    • cabbage
    • Cakes
    • Candy
    • casseroles
    • chicken
    • Cook Books
    • Cookies
    • Desserts
    • drinks
    • Equipment
    • Family
    • Featured
    • Holiday
    • jams jelly preserves
    • Main Dish
    • pasta
    • Pickles and Relish
    • Pie and Pastry
    • Preserving
    • printed in binder
    • pumpkin
    • Recipe Box on desk
    • rhubarb
    • Salads
    • seafood
    • side dish
    • Soup
    • turkey
    • Uncategorized
    • Vegetable
    • zucchini

    Meta

    • Log in
    • Entries feed
    • Comments feed
    • WordPress.org

    Copyright © 2025 Crossfield Collection Recipes on the Foodie Pro Theme