• Skip to primary navigation
  • Skip to main content
  • Skip to primary sidebar

Crossfield Collection Recipes

  • Main Dish
  • Beverages
  • Appetizers
  • Cakes
  • Cookies
  • Holiday
  • Books
  • Journal
You are here: Home / Archives for Holiday

Holiday

Suet Pudding – Grandma Elma Cary McP

January 18, 2023 by Serena Leave a Comment

1/2 cup suet. ground or shopped fine

1 cup boiling water

salt

2/3 cup molasses

1 teaspoon soda

Enough flour to make a stiff batter

Raisins – optional

Put water over suet, add salt, and let stand for a few minutes.

Add molasses, soda and raisings.

Add enough flour to make a stiff batter.

Steam until done on top of stove in steamer or double boiler.

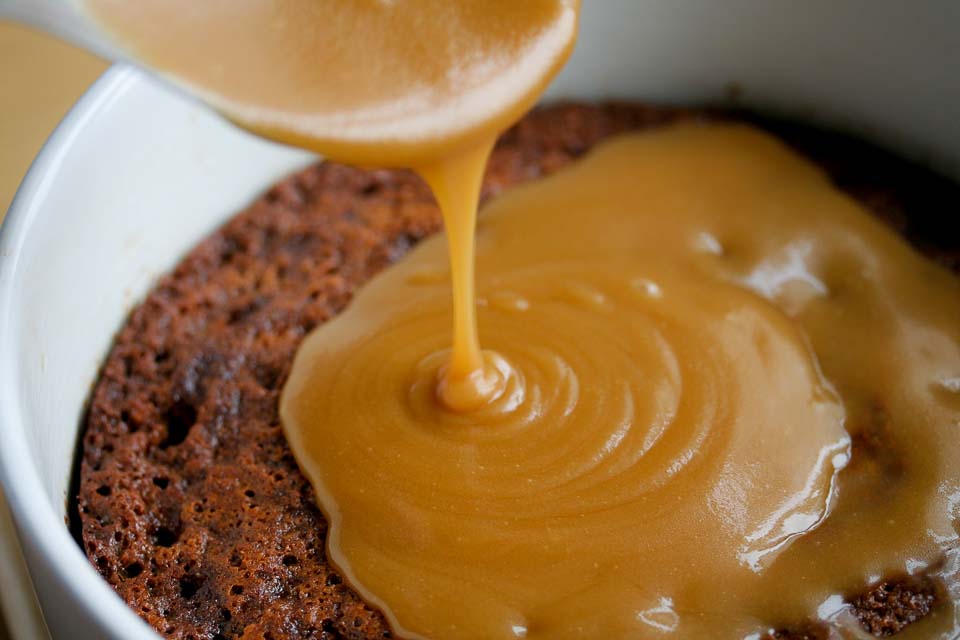
Serve sliced with hard sauce.

Recipe from wedding shower box of recipes 1982. Family tradition for Christmas

Filed Under: Desserts, Family, Holiday

Date and Walnut Bars

December 19, 2022 by Serena Leave a Comment

3/4 cup unsifted all purpose flour
1 tsp baking powder
1/2 teaspoon salt
2 eggs
1 cup light brown sugar, packed
1 cup slice dates
1 cup coarsely chopped walnuts
1 tsp vanilla extract
confectioners sugar to dust with

Preheat oven to 350 degrees. Lightly grease and line the bottom of a 9x9x2 baking pan with waxed paper or parchment.

Sift the flour with the baking powder and salt. Stir and set aside.

In a medium bowl, with electric mixer beat the eggs and sugar until light. Add the brown sugar. beating until smooth and fluffy.

Add the chopped dates, chopped nuts and vanilla and mix well. Stir in the dry ingredients and mix well.

Spread into the prepared pan.

Bake 25 to 30 minutes, or until surface springs back when lightly pressed with fingertips.

Cool slightly. Remove from pan to wire rack, peel off the wax paper while still warm.

With a sharp knife, cut into 24 bars while still warm, cutting at an angle to make diamond shaped cookies.

Dust lightly with confectioners sugar.

Makes 24 cookies.

Recipe from Mary Roth from the Windmill 

Been a family tradition since the recipe was shared in the 1980’s. Great way to use fresh dates at other times for a nice treat. Recipe given by Mary Roth at the Windmill Farm Market when we both were vending there.

Filed Under: Cookies, Holiday, Recipe Box on desk

Master List of Recipes

December 13, 2022 by Serena Leave a Comment

Master List of Recipes

Will be making a master list of all recipes soon. Check back later. Working on revisions and organization of recipes

Regular Posts Recipes format

Date and Walnuts Bars


Recipes in the WP Recipe format

Coconut Cookies – God Jul


Filed Under: Cookies, Holiday, Recipe Box on desk

Cinnamon Bun Mix – King Arthur Baking

December 28, 2021 by Serena Leave a Comment

single glazed cinnamon bun in front of pan of rolls

Bought the box mix for Cinnamon Bun Mix from King Arthur Baking to try out and compare against my family’s traditional recipe for cinnamon buns.

Box contained a packet of spice mix and a packet for glaze mix in addition to the dough mix.

The dough mix contained flour (wheat flour and malted barley flour), cane sugar, nonfat dry milk, sour cream, sea salt, and flavoring .

The filling mix contained cane sugar, Vietnamese Cinnamon, cornstarch

The glaze contained confectioner’s sugar and flavoring

Yeast was a pre-measured packet that had yeast and ascorbic acid.

The mix only made 9 cinnamon rolls.

Reactions: the dough did not rise very much the first or the second time.  Not sure about the yeast packet since since it was a pre-measured sort of thing and there was no date on the yeast packet for determining how fresh the yeast was. The box recommended the mix be used before 09/15/22.  I was sure that the water was not too hot and was only barely lukewarm. So not sure why it did not raise more.  The directions called for adding in to the flour mixture.

New technique of making the filling into a paste and spreading on the rolled out dough. Have always just sprinkled the spice and sugar mixture over top of melted buttered dough rolled out to size. This dough did not not call for spreading melted butter on first.

Tasted good but there was some sort of taste that I picked up that I did not really like.  Not sure if it was the Vietnamese cinnamon or not.  In my pantry I have both Vietnamese Cinnamon and cinnamon that I have purchased from Oak Hill bulk foods since I do so much baking. The batch of cinnamon rolls that I had made from scratch the week before used the Oak Hill cinnamon and was the traditional family recipe.  Will have to experiment and see if I get that same reaction. Those rolls were much better tasting than this box mix. They also rose higher and the dough had more of a buttery taste and had more butter in them.

The cost for the mix $14.95) and the small number of rolls (only nine) will probably prevent me from buying the mix again. If I had to pay for shipping it would also add to not buying again. But since was buying other items I included it in an order and it was worth a purchase to check it out.

Front Cover of Box for Cinnamon Bun Mix

Filed Under: Bread, Holiday Tagged With: rolls

Pumpkin Cake

October 15, 2021 by Serena Leave a Comment

  • 2 cups (250g) all-purpose flour (spoon & leveled)
  • 2 teaspoons baking powder
  • 1 teaspoon baking soda
  • 1 teaspoon salt
  • 1 and 1/2 teaspoons ground cinnamon
  • 2 teaspoons pumpkin pie spice*
  • 1 cup (240ml) canola or vegetable oil*
  • 4 large eggs
  • 1 cup (200g) packed light or dark brown sugar
  • 1/2 cup (100g) granulated sugar
  • 1 (15 ounce) can pumpkin puree*
  • 1 and 1/2 teaspoons pure vanilla extract

Cream Cheese Frosting

  • 8 ounces (224g) full-fat block cream cheese, softened to room temperature
  • 1/2 cup (115g) unsalted butter, softened to room temperature
  • 3 cups (360g) confectioners’ sugar, plus an extra 1/4 cup if needed
  • 1 teaspoon pure vanilla extract
  • 1/8 teaspoon salt

Instructions

  1. Preheat the oven to 350°F (177°C) and grease a 9×13 inch baking pan. I always use this glass pan.
  2. Whisk the flour, baking powder, baking soda, salt, cinnamon, and pumpkin pie spice together in a large bowl. Set aside. Whisk the oil, eggs, brown sugar, granulated sugar, pumpkin, and vanilla extract together until combined. Pour the wet ingredients into the dry ingredients and use a mixer or whisk until completely combined. Batter will be thick.
  3. Spread batter into the prepared pan. Bake for 30-36 minutes. Baking times vary, so keep an eye on yours. The cake is done when a toothpick inserted in the center comes out clean. If you find the top or edges of the cake is/are browning too quickly in the oven, loosely cover it with aluminum foil.
  4. Remove the cake from the oven and set the entire pan on a wire rack. Allow to cool completely. After about 45 minutes, I usually place the cake in the refrigerator to speed things up.
  5. Make the frosting: In a large bowl using a handheld or stand mixer fitted with a paddle or whisk attachment, beat the cream cheese and butter together on high speed until smooth and creamy. Add 3 cups confectioners’ sugar, vanilla, and salt. Beat on low speed for 30 seconds, then switch to high speed and beat for 2 minutes. If you want the frosting a little thicker, add the extra 1/4 cup of confectioners sugar (I add it). Spread the frosting on the cooled cake. Refrigerate for 30 minutes before serving. This helps sets the frosting and makes cutting easier.
  6. Cover leftover cake tightly and store in the refrigerator for 5 days.

This is the BEST pumpkin cake I’ve ever had and I know you’ll feel the same way! It’s supremely moist, soft, rich, and spiced with pumpkin spice flavor.

  1. Make Ahead Instructions: Prepare cake through step 4. Cover the cake tightly and refrigerate for up to 2 days or freeze up to 3 months. Bring to room temperature, make the frosting, frost, and serve. Frosted cake freezes well, up to 3 months. Thaw overnight in the refrigerator, bring to room temperature or serve cold.
  1. Cupcakes: This batter yields about 24-28 cupcakes. Same oven temperature, fill the cupcake wrappers 2/3 full, and bake 18-21 minutes or until baked through. For 1 dozen cupcakes, use my pumpkin cupcakes recipe.
  2. Bundt Cake: This batter will fit into a 9.5 or 10 inch Bundt pan. Same oven temperature. But for ease, I suggest using my pumpkin Bundt cake recipe. Same great flavor and texture as this cake! You can leave out the chocolate chips.
  3. 2 Layer Cake: Pour batter evenly into two 9-inch round cake pans. Same oven temperature, bake for 25 minutes or until baked through. This frosting is enough for a 2 layer cake.
  4. Spices: Instead of prepared pumpkin pie spice, you can use 1/2 teaspoon each: ground nutmeg, ground cloves, ground allspice, and ground ginger.

The Best Pumpkin Cake I’ve Ever Had

made 10-15-21

Filed Under: Cakes, Holiday

Fruitcake

January 19, 2021 by Serena Leave a Comment

Fruitcake – recipe from Ann Stover in 1978. Has become a family favorite.

1 cup chopped candied cherries
1 cup yellow raisins
1 cup chopped candied pineapple
2 1/2 cups candied fruit mix
1 cup chopped walnuts (or less)

3 cups flour
1 cup butter or margarine
1 cup sugar
4 eggs
3/4 cup corn syrup
1 tsp orange extract
1 tsp rum extract
1 tsp vanilla

Combine fruit and nuts with one cup of the flour and mix.

Cream butter and sugar until light. Add eggs one at a time beating well after each egg.
Combine corn syrup and flavorings and add to mixture.

Add alternately the dry ingredients with the wet mixture. Fold in the fruit/nuts mixture.

Grease pans.  Makes eight small loaves of the 4.5 x 2.75 x2.25 size or can make three regular size bread pan.

Bake 275 degree for one hour. Remove fruitcake within 5 to 10 minutes checking for doneness and let cool completely.

Wrap cakes in foil with sheeting (sheeting dipped in pineapple or orange or combination of juices. Add rum or brandy if desired too.)

Let sit in refrigerator for one week.

Repeat dipping sheet and wrap again. Repeat again in another week if cakes are uneaten.


Filed Under: Family, Holiday

Gingerbread House Kit 2020 Cookie Cutters

January 8, 2021 by Serena Leave a Comment

I bought some new cookie cutters in December 2020 to make a gingerbread house using a molasses cookie dough. I did not want to put together a full house but thought that a platter of cookies with these shapes would work.  Will try again at another time to make  in the shape of a gingerbread house and decorate the cookies.

Due to major shipping delays with the Covid Virus infecting everyone and postal service backlog of deliveries the cookie cutters never arrived in time for me to try them out for the holiday. Big disappointment.


gingerbreadhouse cookie kit

Gingerbread House Cookie Kit


Filed Under: Cookies, Holiday

Best Cut-Out Cookie Recipe

January 8, 2021 by Serena Leave a Comment

Ingredients

1 ½ cups butter softened
2 cups white sugar
4 eggs room temperature
½ teaspoon vanilla extract
¼ teaspoon almond extract
5 cups unbleached flour
2 teaspoons baking powder
1 teaspoon salt
powdered sugar for rolling

Instructions

In a large mixing bowl (or your stand mixer), beat together butter and sugar until light in color and fluffy. Add eggs, one at time with mixer running on low. Turn mixer up to medium and beat until well combined for about 2-3 minutes. Add extracts as mixer is going.
Combine dry ingredients and slowly add to butter mixture, beating on low speed until just combined.
Place about 1 cup dough mixture onto parchment paper or wax paper that has been dusted with powdered sugar and cover with an additional sheet of parchment paper. Using a rolling pin, roll out to ¼ inch thickness and place in sealed storage bag or large covered container.

General Tips

  • For best results, be sure to use room temperature eggs and butter.
  • Re-roll sugar cookie dough scraps up to 3 times (refrigerating dough in-between if the dough becomes warm and squishy)
  • If using sprinkles, it is best to put on the cut out cookies before baking.
  • If icing these cut out cookies, let the cookies cool completely before icing.
  • Sugar Cookies will keep in an airtight container for 5 days. Be sure to store in the refrigerator if cookies are iced and let them come to room temperature before enjoying for best taste.
  • To Freeze Baked Cut-Out Cookies, allow cookies to cool fully and then place into a sturdy freezer-safe container and freeze for 2 months.
  • To Freeze Sugar Cookie Dough, Place dough on parchment paper in flattened rounds. Place the dough into a freezer-safe bag and tightly seal. Freeze for up to 3 months. Thaw the dough out in the fridge the night before baking. And then roll out and bake as directed.
  • Bake Sugar Cookies. Bake for 6-7 minutes at 400 degrees. Bake until the tops of the cookies are just set. Don’t let the bottoms brown too much, or these cookies will lose the softness they are known for. Remove from oven and let cool on the baking tray for 1 to 2 minutes before removing to a cooling rack to cool completely.

Original Recipe Source: The BEST Cut-Out Cookie Recipe https://amindfullmom.com/best-cut-out-cookie-recipe/ November 28, 2020

Made recipe 2020. Excellent taste.  Left dough in refrigerator two days before rolling. Should have rolled per instructions since it was a huge hard ball of dough that was hard to portion out to roll out and needed to soften first.  Should have made cookies a little thicker for softer cookies.  Very similar to Mom’s crispy cutout cookie recipe but has butter instead of shortening.  these taste better than Mom’s recipe.  This is the Sugar Cookie recipe you have been looking for! This recipe produces the most perfect Cut Out Cookie EVERY single time. They bake up soft, are full of flavor, and the dough holds its shape while baking.

HOW TO FREEZE SUGAR COOKIES

You can freeze both iced and un-iced sugar cookies in the freezer, keeping in mind that iced cookies will not retain their flavor as long when stored in the freezer as plain sugar cookies do.

FOR NON ICED SUGAR COOKIES

  • Bake as directed and allow the cookies to cool fully.
  • Place the cookies into a freezer-safe container, separated by layers of parchment or wax paper, and freeze for up to 2 months.

FOR ICED SUGAR COOKIES

  • Place decorated cookies onto a cookie sheet and freeze until solid, about 1 hour. This will keep the icing from sticking to other cookies or parchment paper.
  • Once the icing is hard to the touch, transfer cookies to a freezer-safe container, being sure to place a layer of parchment paper or wax paper in between layers of cookies.
  • Iced Cut Out Cookies will last in the freezer for 4-6 weeks.

FREEZING SUGAR COOKIE DOUGH

  • Prepare cookie dough as directed.
  • Divide the sugar cookie dough into 3-4 sections and place each section on parchment paper.
  • Cover each section of dough with another piece of parchment paper and lightly flatten the dough into an even disk.
  • Place the sugar cookie dough into a freezer-safe bag and tightly seal.
  • Freeze for up to 3 months.
  • To bake, place dough in the refrigerator the night before to thaw. Roll out and bake as directed.


  • The cookies are buttery and soft. If rolled too thin they will be crispy.
  • They hold their shape perfectly when baked–meaning you actually know if your cookie is supposed to be a Christmas tree or whatever shape you used!
  • These sugar cookies are NOT bland in flavor. You can eat them plain or iced and will thoroughly enjoy them.
  • Even after rolling and re-rolling, and re-rolling some more, these Cut Out Cookies turn out tender and perfectly baked.
  • They can be made months in advance and frozen for future use.
  • To prevent cookies from spreading be sure your dough is well-chilled and re-chill your scraps after they get warm before cutting into more shapes. You also do not want to grease your cookie sheet. Use parchment paper or a nonstick pan instead.

Why powdered sugar?
I strongly suggest you use powdered sugar instead of flour for rolling out the sugar cookie dough. The powdered sugar works to keep the dough from sticking to your work surface just like flour, but the powdered sugar dissolves into the cookie when baked. Meaning, no raw flour taste or cookie coated in white dust.

How do you roll out sugar cookie dough evenly?
To roll out sugar cookie dough, I think it is best to roll out your cookie dough before refrigerating. It is MUCH EASIER to manage. To ensure the dough is even when rolled out, my tip is to use wooden spoons on either side of the cookie dough. These wooden handles work as a guide so that your dough will be rolled out to the same depth as the handle, about ¼ inch-evenly across the parchment paper or working surface.

What if sugar cookies look under-baked?
Do not be tempted to over-bake sugar cookies. They should be very blond in color and just set to the touch. Leave the cookies on the cookie sheet for 1-2 minutes to continue cooking a bit after removing from the oven and then transfer to a cooling rack to cool completely. Sugar cookies will go from perfectly cooked, to very crispy and browned in a matter of a minute or two and will lose the soft texture they are known for.

How many times can I re-roll dough scraps?
After you cut out as many cookies as you can, place the scraps together to form a ball of dough and roll out the sugar cookie dough again and cut out additional cookies. After that process has been repeated, place the 2nd batch of scraps together. Refrigerate for 30 minutes and roll out the sugar cookie dough one final time. That is a total of 3 times for rolling out sugar cookie dough. Any additional rolling after that will result in an overworked cookie that will be tough and burn easily.


Filed Under: Cookies, Holiday

Sticky Toffee Pudding with Dates

December 28, 2020 by Serena Leave a Comment

Original Source:  https://www.browneyedbaker.com/sticky-toffee-pudding-recipe/

Adaption One: https://www.davidlebovitz.com/warm-sticky-toffee-pudding/

Adaption Two (mine made in 2020 ) – same basic recipe but I used dark brown sugar, molasses and added some candied fruit. Definitely need to serve warm!!

Sticky Toffee Pudding demands to be served warm. I mean, think about it: soft dates, gobs of toffee, and buttery cake. If you’re going to eat a cake smothered in creamy, sugary toffee sauce, if you don’t eat it warm, you’re missing out on of one life’s great pleasures.

For the toffee sauce

2 cups (500ml) heavy cream
1/2 cup (90g) demerara or muscovado sugar, or another dark brown sugar
2 1/2 tablespoons golden syrup or molasses
pinch of salt

For the pudding

6 ounces (180g) pitted dates, snipped or chopped
1 cup (250ml) water
1 teaspoon baking soda
optional: 1/3 cup (40g) candied ginger, chopped
1 1/4 cups (175g) flour
1 teaspoon baking powder
1/2 teaspoon fine sea salt
4 tablespoons (55g) unsalted butter
3/4 cup (150g) granulated sugar
2 large eggs, at room temperature
1 teaspoon vanilla extract
1. Preheat the oven to 350F (190C) and butter an 8 1/2-inch (24cm) porcelain soufflé dish (or similar-sized baking dish.)
2. Make the toffee sauce by bringing the cream, demerara or turbinado sugar, golden syrup (or molasses) and salt to a boil in a medium saucepan, stirring often to melt the sugar.
3. Lower heat and simmer, stirring constantly for about 5 minutes, until the mixture is thick and coats the spoon. Pour half the sauce into the prepared soufflé dish and place the dish in the freezer, and reserve the other half for serving.
4. To make the pudding, in a medium saucepan, heat the dates and water. Once the water begins to boil, remove from heat and stir in the baking soda. Add the ginger, if using, then set aside, but keep it slightly warm.
5. In a small bowl, sift together the flour, baking powder, and salt.
6. In the bowl of a standing electric mixer, or by hand, beat the butter and granulated sugar until light and fluffy. Gradually beat in the eggs, then the vanilla. (Don’t be alarmed if the mixture looks a bit curdled.)
7. Stir in half of the flour mixture, then the date mixture, then add the remaining flour mixture until just mixed. Don’t overbeat the batter.
8. Remove the soufflé dish from the freezer and scrape the batter into the soufflé dish and bake for 50 minutes, or until a toothpick inserted into the center comes out with moist crumbs attached.
9. Remove the pudding from the oven, and let cool slightly before serving.

Serving: Spoon portions of the cake into serving bowls and douse with additional warm toffee sauce. Whipped cream or vanilla ice cream are good accompaniments, although I enjoy it just as it is.

Note: To make the pudding in advance, bake the cake without the toffee in the bottom. Let cool, then cover until close to serving time. Poke the cake about fifteen times with a chopstick. Distribute half of the sauce over the top, as shown in the photo, cover with foil, then re-warm in a 300F (150C) oven, for 30 minutes.

Filed Under: Desserts, Holiday Tagged With: dates

Raspberry Lemon Thumbprint Cookies

December 12, 2020 by Serena Leave a Comment

RASPBERRY LEMON THUMBPRINT COOKIES
MAKES 4 DOZEN COOKIES
1/2 cup raspberry jam or jelly
1 tablespoon raspberry liqueur, such as Chambord
2 1/4 cups all-purpose flour, plus more for forming
1 teaspoon baking powder
1/4 teaspoon salt
2 sticks (1 cup) butter, at room temperature
2/3 cup sugar
2 large egg yolks
1 tablespoon finely grated lemon zest
1 tablespoon fresh lemon juice
1 teaspoon pure vanilla extract


Preheat the oven to 350 degrees F. Line two rimmed baking sheets with parchment paper.
In a small bowl, stir to combine jam and Chambord; set aside.
In a medium bowl, whisk to combine flour, baking powder, and salt.
In the bowl of an electric mixer fitted with the paddle attachment, beat the butter and sugar until light and creamy. Add egg yolks, one at a time, along with the lemon zest, lemon juice and vanilla and beat until combined.
Add the flour mixture, in 2 additions, and beat just until moist clumps form.
Remove dough from the bowl and gather with your hands to form a ball.
Pinch off small pieces of dough and roll to form 1-inch balls.
Place on prepared baking sheets, about 1 inch apart.
Dip your index finger in flour and press into a ball of dough to form an indentation in the center of each ball. Fill each indentation with nearly ½ teaspoon reserved jam mixture.
Transfer to oven and bake until golden brown, about 20 minutes.
Transfer cookies to wire racks to cool completely.
Recipe courtesy Emeril Lagasse, copyright Martha Stewart Living Omnimedia, LP., all rights reserved. 


Emeril Lagasse
Emeril Lagasse
https://www.youtube.com/watch?v=fwBFaTOH0AU

Filed Under: Cookies, Holiday, Uncategorized

  • « Go to Previous Page
  • Page 1
  • Page 2
  • Page 3
  • Go to Next Page »

Primary Sidebar

Recent Posts

  • Apple Cider Snickerdoodles
  • Rhubarb Butter
  • My Best Clam Chowder
  • Banana Cake with Cream Cheese Frosting
  • Easy Goulash Recipe

Recent Comments

  • Serena on Rhubarb Butter

Archives

  • September 2025
  • June 2025
  • February 2025
  • January 2025
  • August 2024
  • June 2024
  • May 2024
  • March 2024
  • February 2024
  • January 2024
  • December 2023
  • October 2023
  • August 2023
  • July 2023
  • June 2023
  • May 2023
  • February 2023
  • January 2023
  • December 2022
  • November 2022
  • October 2022
  • September 2022
  • August 2022
  • July 2022
  • May 2022
  • April 2022
  • January 2022
  • December 2021
  • November 2021
  • October 2021
  • September 2021
  • August 2021
  • July 2021
  • June 2021
  • May 2021
  • April 2021
  • January 2021
  • December 2020
  • November 2020
  • October 2020
  • September 2020
  • August 2020
  • July 2020
  • June 2020
  • January 2020
  • October 2019
  • September 2019
  • August 2019
  • July 2019
  • December 2018
  • October 2018
  • September 2016
  • October 2014
  • January 2014
  • December 2013
  • October 2013
  • September 2013
  • June 2010
  • February 2010
  • January 2010
  • October 2009

Categories

  • appetizer
  • beef
  • Beverages
  • Bread
  • Breakfast
  • cabbage
  • Cakes
  • Candy
  • casseroles
  • chicken
  • Cook Books
  • Cookies
  • Desserts
  • drinks
  • Equipment
  • Family
  • Featured
  • Holiday
  • jams jelly preserves
  • Main Dish
  • pasta
  • Pickles and Relish
  • Pie and Pastry
  • Preserving
  • printed in binder
  • pumpkin
  • Recipe Box on desk
  • rhubarb
  • Salads
  • seafood
  • side dish
  • Soup
  • turkey
  • Uncategorized
  • Vegetable
  • zucchini

Meta

  • Log in
  • Entries feed
  • Comments feed
  • WordPress.org

Copyright © 2025 Crossfield Collection Recipes on the Foodie Pro Theme